
Welcome to CYPEX, a cutting-edge tool that will improve software development and help you build applications more quickly.
In this document, you will learn how to get started with CYPEX and deploy the software in your infrastructure quickly and efficiently to ensure you can get started promptly.
Running CYPEX in your environment is easy. This section will give you an overview of how things work and how you can get started with CYPEX. Please follow the steps outlined in this document to start your development process. Before you begin, you have the flexibility to choose between two editions suited to meet your needs.
1. Free Trial Edition:
Experience the power of CYPEX with our Free Trial Edition. This option allows you to:
- Try Before You Buy: Explore the features and functionalities with a demo version of CYPEX
- Demo Data: Benefit from pre-loaded demo data to get a feel for how the app works in different scenarios.
- Limits Apply: Please note that the Free Trial Edition comes with certain usage limits. These limits are in place to provide you with a comprehensive trial experience.
To start with the Free Trial Edition, follow the installation steps outlined in this guide.
2. Enterprise Edition:
For users seeking the full potential of CYPEX without any limitations, we offer the Enterprise Edition. With the Enterprise Edition:
- Unlimited Access: Enjoy unrestricted access to all features and capabilities of CYPEX.
- Customization: Tailor the app to your specific requirements and workflows.
- Priority Support: Benefit from priority customer support for timely assistance.
- License Purchase Required: A valid license purchase is required to unlock the Enterprise Edition’s limitless possibilities.
If you’ve decided that the Enterprise Edition is the right fit for you, contact sales@cybertec.at to discuss licensing options and initiate the purchasing process.
CYPEX is distributed as a set of Docker images brought by Docker Compose, each fulfilling a distinct role within the system. Let’s explore these key components:
- API Container: This container forms the foundation of the application, controlling its essential functionalities.
- UI Container: Responsible for managing the User Interface, ensuring a seamless and engaging user experience.
- PostgREST Container: A standalone web server transforming your PostgreSQL database into a RESTful API. Structural constraints and permissions in the database determine the API endpoints and operations.
- Database Container: PostgreSQL database with automatic health monitoring and optimized configuration.
These containers are integral and mandatory components.
Database Options:
- Internal Database Container: It ships with the application and provides a self-contained option. It’s ideal when avoiding external database connections. The internal database includes automatic health monitoring and optimized PostgreSQL configuration.
- External Database: Utilize your own PostgreSQL database (version 13 or higher). CYPEX seamlessly integrates, offering flexibility in database choices.
LDAP Integration:
While there isn’t a dedicated LDAP container, CYPEX fully supports LDAP connections. Setting up Single Sign-on transforms into a smooth process if an LDAP server is already operational.
CYBERTEC provides two convenient methods for obtaining the application:
Use the following link to access our Git repository: CYPEX.
Simply clone the repository to get a copy of CYPEX. Use a Personal Access Token (PAT) instead of a password for GitHub authentication via the command line or API. Treat PATs like passwords; consider fine-grained PATs over classic ones for added security. Note that PATs are user-specific and will become inactive if the user loses access to the resource. For organization-specific control, owners can set policies for classic PAT access. Refer to GitHub documentation for token security and usage details: Managing your personal access tokens.
The repository will contain a set of scripts to help you deploy CYPEX by automating access to DockerHub.

There are three ways to clone the repository:
Using HTTPS
To download via HTTPS, use the following instructions:
git clone https://github.com/cybertec-postgresql/cybertec_cypex.git
Using SSH
If you prefer SSH, consider the following command:
git clone git@github.com:cybertec-postgresql/cybertec_cypex.git
Using the GitHub CLI
Alternatively, you can make use of the GitHub CLI, which works as follows:
gh repo clone cybertec-postgresql/cybertec_cypex
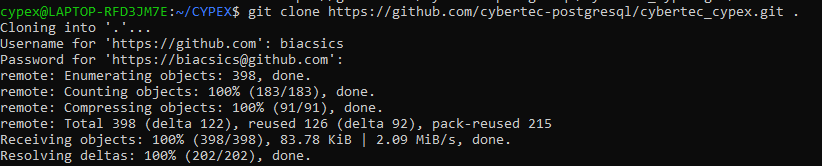
Cloning the repositories will download all these files onto your local machine, as illustrated in the image below:

After completing this process, you will discover several files necessary for the following steps:

Congratulations. You have successfully cloned the CYPEX repository. You can now continue with the installation process and configure the infrastructure.
Access the provided download link. Save the downloaded file to your preferred location on your local machine. Untar, replacing <tag> with the latest provided version, e.g. v1.9.1:
mkdir cybertec_cypex
tar -xzvf cybertec_cypex-<tag>.tar.gz -C cybertec_cypex --strip-components=1
cd cybertec_cypex
Before processing the installation, make sure the following system requirements are met:
- Docker (>= 20.10)
- docker-compose (>= 1.27.0)
- git (>= 2.20.1)
- bash (>= 4.0)
- jq
macOS Specific Requirements:
The sed program on macOS is not a standard (GNU) one. To get the normal one, use brew:
brew install gnu-sed
After this, alter PATH. For example, add the following line to your ~/.bash_profile or ~/.zshrc:
For Apple Silicon Macs (M1/M2/M3):
PATH="/opt/homebrew/opt/gnu-sed/libexec/gnubin:$PATH"
For Intel Macs:
PATH="/usr/local/opt/gnu-sed/libexec/gnubin:$PATH"
Windows Requirements:
After downloading an App folder, open a console and navigate to the CYPEX folder using the cd command.
Load necessary Docker Images for offline installer scenarios:
./cypex load-docker-images
Generate default configuration:
./cypex configure
This command offers the following scenarios:
Do you want to install the enterprise version of CYPEX? - Yes/No
(Enterprise requires a license for the Trial choose No)
Do you want to install CYPEX with an existing database? - Yes/No
(If No - the PostgreSQL database will be installed within a Docker container. No extra configuration is needed).
If Yes, you must provide the database connection information for the existing one:
./cypex config database.host <host-name or IP>
./cypex config database.port <port-number>
./cypex config database.name <db-name>
./cypex config database.install.user.name <user-name>
./cypex config-database-install-user-password
Note: The database host should be the hostname or IP address, and it should be reachable by the docker containers. Do not use
localhostor similar because the docker containers will resolve their own host as a localhost.Do you want to enable SSL connection for the database? - Yes/No
If
Yes, an additional configuration is needed:CA-CERT file name, example:
root.crt, otherwise, leave it blank.Ensure to copy the file to the
./certsdirectory.CA-CERT file name: Use the
sslrootcertparameter to reference the certificate, for example,sslrootcert=rds-ssl-ca-cert.pem.
Note: The file should be copied to the
certsfolder referenced in the containers via a predefined internal path. Do not use paths, only file names.
The configuration will store the credentials and certificates inside the .secrets directory.
It contains the password files and the nginx/certs directory containing the server-side certificates. To update those certificates, replace them with new ones with the same name:

To pull the necessary docker images and install the application, run the following:
./cypex install

In case this is successful, all the status information should show “done”:

To initiate CYPEX, proceed with the final step. The system will automatically generate an admin user within the APP, generate a password, and present it on the screen for your convenience. Simply run:
./cypex up

Please copy and securely store this password. It is essential. Its importance lies in granting access to the system. Be aware that it cannot be recovered once lost for security reasons.
Optionally, you can also deploy CYPEX extensions. However, this is only needed in case you want to use extensions later on:

If you encounter “role root does not exist” errors during startup, this is automatically handled by the CYPEX installer. The system includes:
- Automatic Health Monitoring: Built-in healthchecks ensure proper database connectivity
- User Context Management: Commands are executed with proper user context
- Module Dependency Resolution: All required components are properly sourced
If issues persist:
# Check database logs
./cypex logs cypex_database

# Restart services
./cypex restart

# Verify configuration
./cypex debug
If services fail to start properly:
# Check service status
./cypex status

# View detailed logs
./cypex logs

# Restart with force recreation
./cypex down
./cypex up
If you encounter port conflicts:
# Configure alternative ports
./cypex config cypex_gui.http.port 8081
./cypex config cypex_gui.https.port 8444
./cypex config cypex_database.port 5433
Ensure proper file permissions:
chmod +x ./cypex
chmod 600 .env
chmod 700 .secrets/
Upon completing the installation script, you will receive a URL guiding you to the system’s login interface. Utilize the login credentials supplied by the installer to access the intuitive graphical user interface offered by the CYPEX.
The following screen will open, allowing you to get started quickly.
Your browser might complain about security-related issues. Note that this is NOT a CYPEX deficiency but a necessary security precaution made by browsers that fancy secure communication.
Open your browser configuration and take a look at the following site. Note that the certificate is not right if the error pops up, as shown in the next listing.


This problem can be fixed by replacing the certificates on the server (see above) during the installation process. Make sure that you have valid certificates in place.
Your IT department will be aware of those requirements.
Alternatively, you can set certificates in your browser. However, in a large-scale organization, this is usually not feasible. Still, it is a good option often used for testing purposes.
Once your certificates are set, you will see the login screen without security warnings:

Log in to the application using the provided prompt credentials in the console.

Additionally, for demo purposes, deploying the data model is accessible from the UI. Use the “Add-ons” menu to navigate to the “Repository Applications”.

In the Actions column, click a button to install the latest version of the demo model. After you get the message about the successful data installation, move to the “Applications” page.

This Demo Data Model contains not only tables and data but also generated Queries (from tables) and a small demo Application. However, Queries and App creation can always be done manually.
Open the terminal and navigate to the folder with cypex scripts using the cd command. Run the following commands:
./cypex cleanup-cypex-database
./cypex uninstall
- In the newest version, you need to delete the
postgres-datafolder manually, only in case the database was installed within the Docker container:
sudo rm -rf postgres-data
- Additionally, ensure your PostgreSQL database instance doesn’t contain
cypexorcypex_%related schemas and tables in case of existing database usage.
For External Database Cleanup:
If you used an external PostgreSQL database, ensure proper cleanup:
# Connect to your PostgreSQL database
psql -h <host> -U <user> -d <database>

# Remove CYPEX schemas
DROP SCHEMA IF EXISTS cypex CASCADE;
DROP SCHEMA IF EXISTS cypex_generated CASCADE;
Remove the folder with the previous CYPEX version, including all scripts.
After successful completion, the newest version can be installed.
The CYPEX installer supports several environment variables for enhanced functionality:
| Variable | Description | Default |
|---|---|---|
DEBUG=true | Enable debug logs | false |
LOG_TIMESTAMP=true | Show timestamps in logs | false |
YES_ALL=true | Assume “yes” to all prompts | false |
NON_INTERACTIVE=true | Disable interactive prompts (CI use) | false |
FORCE_COLOR=true | Force colored output | false |
Core Commands:
./cypex configure- Interactive initial setup./cypex install- Pull Docker images./cypex up- Start all services./cypex down- Stop all services./cypex restart- Restart all services./cypex status- Show service status./cypex logs- View container logs./cypex debug- Show diagnostic information
Configuration Commands:
./cypex config <parameter> <value>- Update configuration./cypex config-database-install-user-password- Set database password./cypex generate-secrets- Generate default secrets
Database Commands:
./cypex psql- Connect to database./cypex install-extensions- Install PostgreSQL extensions./cypex uninstall-extensions- Remove PostgreSQL extensions./cypex cleanup-cypex-database- Remove all database objects
Utility Commands:
./cypex help- Display help information./cypex version- Show current version./cypex check- Verify system dependencies./cypex generate-standalone- Create offline package./cypex load-docker-images- Load Docker images from archive